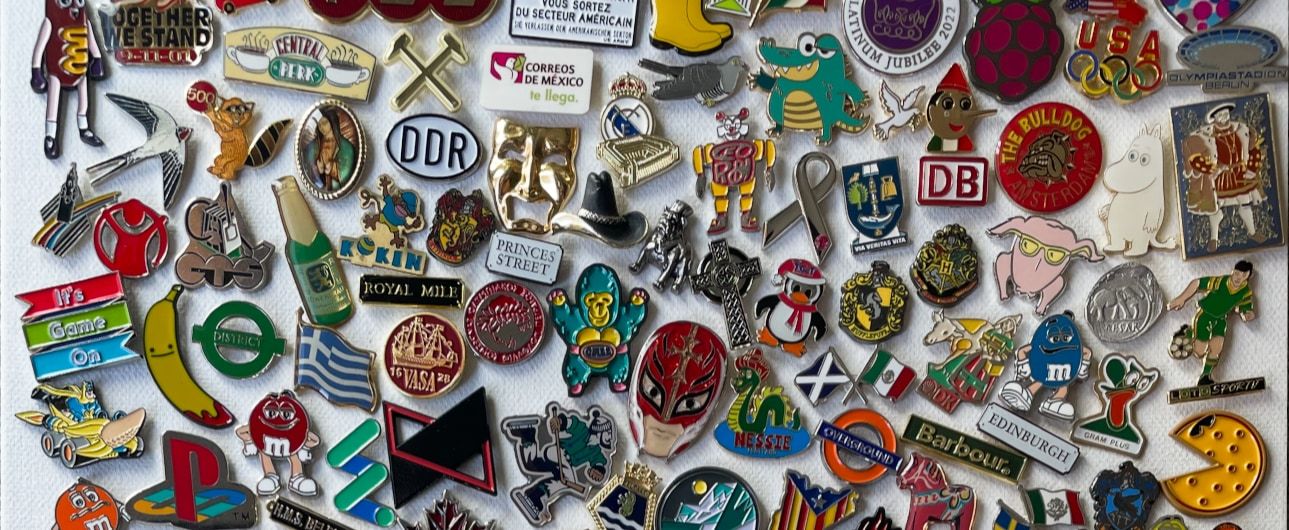
As a hobby that spans across various cultures and ages, pin collecting allows enthusiasts like me to hold onto pieces of art, history, and personal milestones Whether they’re enamel pins from theme parks or vintage lapel pins, I believe each piece in a collection tells a unique story.
In this blog series, I’m excited to share my journey of documenting my extensive pin collection, which consists of gifts, purchases, and serendipitous finds from the streets.

Version 1
So with the help of ChatGPT I built a simple website that allows you to zoom into the whole canvas so that you can look at the pins in more detail, and while I liked the result (you can view it here!), it is far from what I wanted to document my collection.
My ideal collection display
My ideal solution is to create an interactive website where viewers can hover over each pin to see it highlighted, and click for a detailed view and additional information about the pin’s background. Using the canvas image shown above, I embarked on a project to bring this vision to life, leveraging modern machine learning techniques.
Enter Segment Anything
To extract the cutouts from the canvas I thought of using an image segmentation algorithm to extract the silhouettes of the pins. Now, last time I tried to do something related object/edge detection, the model to go was YOLO V2, with great surprise I discovered that advancements have led to YOLO V10!
However, Intrigued by the capabilities of the latest models, I decided to experiment with Meta AI’s Segment Anything Model (SAM), which was released with the promise of being a powerful image segmentation model so I tried it
It turns out that now there is a V10 of YOLO, and it is more powerful than what I was already familiar with. But at the same time, I wanted to try the Segment Anything Model released by Meta AI… so that is what I did.
Installing SAM
I wanted to run everything locally, so I set out to install everything in my Mac M2, it was a bit tricky and involved a lot of trial and error, but here is what in the end worked for me:
1. Create a new Python environment
python -m venv .venvThe version I used to create the environment was 3.10.12
2. Install torch
I found there is specific Apple guidance on how to do this, given that on certain Macs it is possible to take advantage of the GPU:
pip install torch torchvision torchaudio --extra-index-url https://download.pytorch.org/whl/nightly/cpuIn the end, these are the versions I ended up having: torch==2.3.1, torchvision==0.18.1 and torchaudio==2.3.1.
3. Fix NumPy
For some reason, I ran into an issue with NumPy and torch, this StackOverflow answer helped me solving it, by re-installing it with the following command:
pip install numpy -IThe final numpy version was 1.26.4
4. Install Segment Anything
As far as I know, the only way to install the necessary code for SAM is through their GitHub repo:
pip install 'git+https://github.com/facebookresearch/segment-anything.git'5. Download the SAM model
The models and the code for Segment Anything come separately, so to download a model to use:
wget -q https://dl.fbaipublicfiles.com/segment_anything/sam_vit_b_01ec64.pthThere are different versions of models, but sam_vit_b_01ec64 was my choice, mainly because as far as I know, it is the smallest.
6. Remaining tools
To develop and test the model, I used Jupyter, and to visualise the results of the image segmentation I used a package called supervision.
Accessing the SAM model
In order to use the model, it is necessary to open it using Python, here is where you can configure where the model should run (either GPU or CPU, for example), in the code below you will see me configuring the model vit_b, I also attempted to use MPS (metal performance shaders) however I found an error and I just decided to run everything in the CPU:
import torch
from segment_anything import sam_model_registry

# DEVICE = torch.device('mps' if torch.backends.mps.is_available() else 'cpu')
DEVICE = torch.device('cpu')
MODEL_TYPE = "vit_b"
CHECKPOINT_PATH='sam_vit_b_01ec64.pth'

sam = sam_model_registry[MODEL_TYPE](checkpoint=CHECKPOINT_PATH).to(device=DEVICE)
Opening the image
import cv2

IMAGE_PATH= 'pins@high.jpg'
image = cv2.imread(IMAGE_PATH)
image_rgb = cv2.cvtColor(image, cv2.COLOR_BGR2RGB)
The cv2.cvtColor() function converts the colour space of an image. In this case, it’s converting the colour format from BGR to RGB. This is often done because while OpenCV uses BGR, most image applications and libraries use RGB. The converted image is stored in the variable image_rgb.
Generating Automated Masks
SAM has different methods of generating masks, the one I wanted to try initially is by far the easiest one because all you need to do is provide an image and have the model generate the masks for you, all you need is to pass the sam variable (containing the model) to an instance of the SamAutomaticMaskGenerator:
from segment_anything import SamAutomaticMaskGenerator

mask_generator = SamAutomaticMaskGenerator(sam)
Then, to generating the masks is as easy as calling the generate method of the automatic generator passing the RGB image:
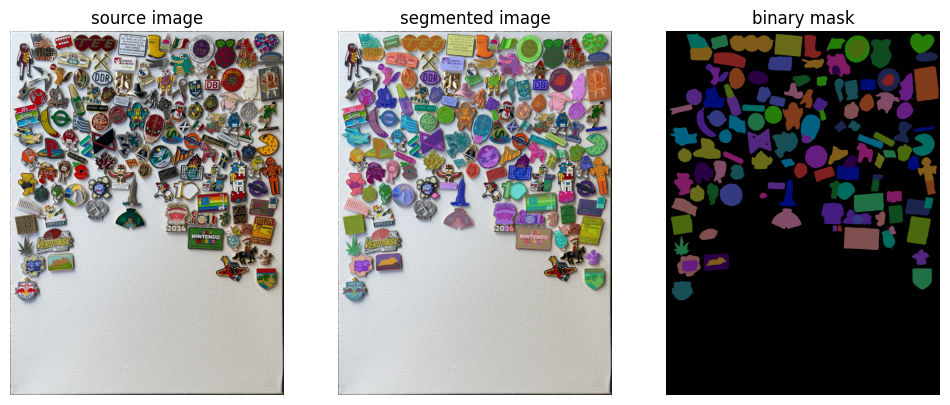
output_mask = mask_generator.generate(image_rgb)SAM is indeed a very powerful model, much more powerful than what I need, at least out of the box, this is the result I get from running the entire image through SAM:

Upon running SAM, the results were not as expected. The model struggled to accurately detect all pins and sometimes misinterpreted parts of pins as separate entities.
I then decided to try to work on a smaller crop of the image, however, I got the same results:

If you are interested in how I managed to display the results, you can have a look at the function I wrote for this task:
import numpy as np
import supervision as sv

def view_masks(source, masks):
    """"
    Display the source image, the segmented image and the binary mask

    :param source: The source image in BGR format
    :param masks: The result of the automatic mask generator call
    """
    mask_annotator = sv.MaskAnnotator(color_lookup=sv.ColorLookup.INDEX)
    detections = sv.Detections.from_sam(sam_result=masks)
    dark = np.zeros_like(source)
    annotated_image = mask_annotator.annotate(scene=source.copy(), detections=detections)
    masked = mask_annotator.annotate(scene=dark, detections=detections)

    sv.plot_images_grid(
        images=[source, annotated_image, masked],
        grid_size=(1, 3),
        titles=['source image', 'segmented image', 'binary mask'])
Conclusion
It may be possible to modify the behaviour of the SamAutomaticMaskGenerator via arguments, however, when I modified some of these arguments I realised that (I did not know what I was doing, and) sometimes the kernel died on me. I suppose my laptop does not have enough memory to run some combinations.
While the initial attempts with SAM presented challenges, they provided valuable learning opportunities. In the next blog post, I will explore alternative methods and adjustments to enhance pin detection and achieve the interactivity I envision for my collection’s display.